


What is Print Ready Artwork? This term in the print industry refers to a digital document that is ready for print and meets all printing standards.
To be print ready means that the digital art that you provide is usable “as is” without requiring any editing.
There are some common factors that are often overlooked when preparing artwork for print. Below you will find the most common errors that can be overcome to get your artwork right first time around.
Fonts
There are thousands of fonts available on the market they also come with many software packages, can be bought and downloaded for free.
If the font is not available to your printer an alternate font will be used which will throw out your artwork design.
How to avoid Font issues
- Outline your font – Design packages are able to turn type fonts into objects – this is the recommended method.
- Supply your font – Some printers will allow you to supply the fonts in a separate file for them to use.
- Create a JPG – When you create a JPG of your artwork the fonts embed into the file – quick and easy solution.

Image Resolution
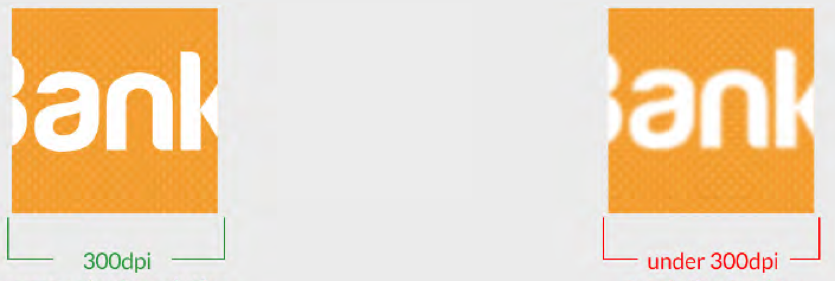
All artwork ready print regardless of the printer must be 300 DPI or PPI. This refers to the number of dots or pixels per inch (dot density).
Any images, including logos and artwork need to meet this threshold in order for the final print to be sharp. If your images are less than 300 DPI/PPI they will appear pixelated on the print.
Colour Mode
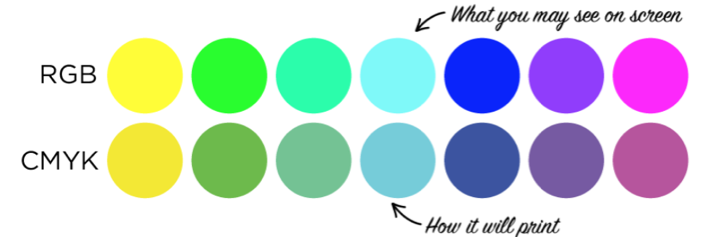
Always design in CMYK colour space when preparing your projects to be print ready. The most common colour modes are CMYK and RGB. CMYK is for print whilst RGB is for web space development (what you see on your computer screen).
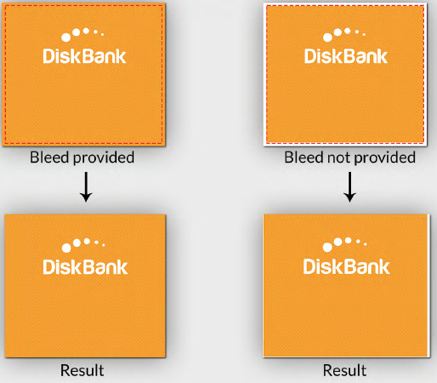
Bleed | Safe print area
When creating your artwork as print ready please add bleed to your project and adjust the artwork to fit the safe print area. Printers are unable to print to the edge of paper – so all documents have trim marks set 3mm outside of the artwork area to enable trimming to the artwork edge.
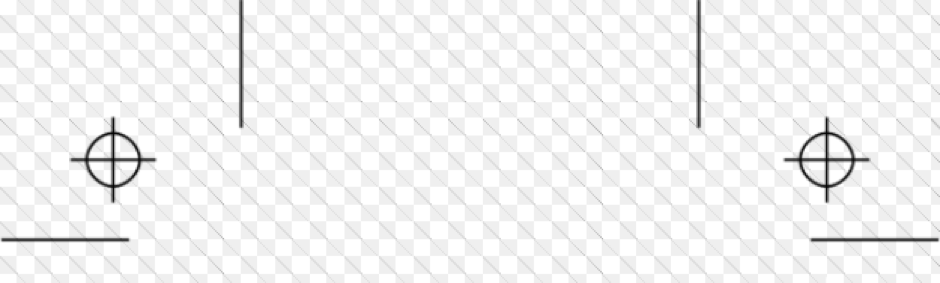
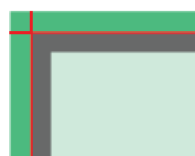
Bleed
The print standard for bleed is 3mm, this area allows for inaccuracies in printing, trimming or folding – it ensures there are no white sections visible on the edge of the finished project.
Safe Print Area
The safe print area is the area 3mm inside the document edge, it creates a safety zone for the art you place. It ensures your artwork doesn’t get cut off due to inaccuracies in printing or folding.

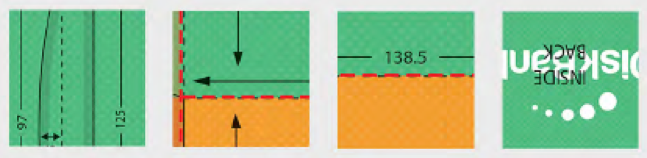
Templates
Any template you work on will have the bleed area, the trim line and the artwork safe zone – if it doesn’t – stick with the above and your artwork will be fault free.
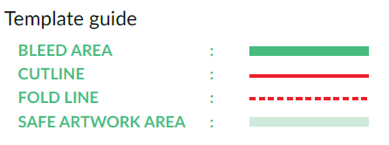
Artwork Templates
Templates have a variety of elements visible including bleed, cut line, safe artwork area, measurements, arrows, text etc.
These items are to guide you in placing your artwork not for printing with your artwork.
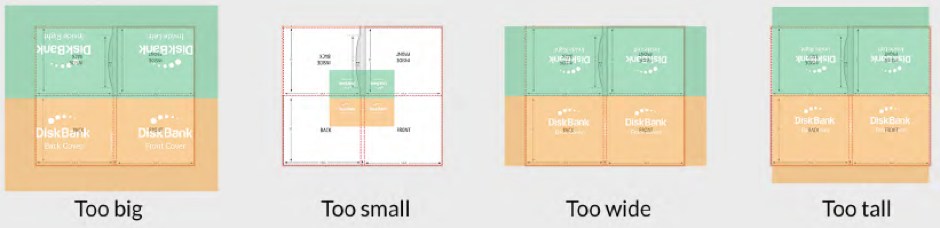
Artwork Dimensions
Artwork that is not supplied with correct dimensions causes problems in print due to scaling.
Too Big – want to make sure your images are all high res so designed your project 4 x the size required? This will cause your files to be too large and compromise the scaling.
Too Small – prepared your project at half the size? When we scale this project the images will be blurry and text out of focus.
Too wide – artwork trimmed from both sized
Too tall – artwork trimmed from top and bottom
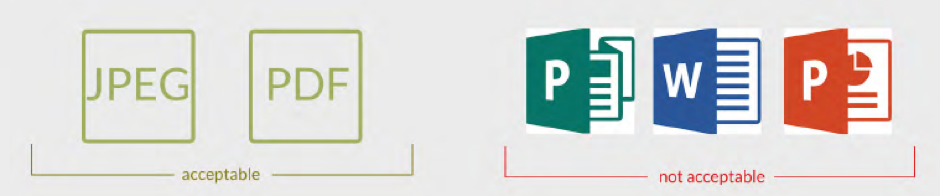
Valid Print file types
Print ready files accepted are JPG or PDF files, check with your printer if they accept other file types. Files not accepted include powerpoint, word, excel, publisher.
Final Inspection
You have done the hard work now for the final inspection.
Spell check – double check all spelling
Re-inspection – double check all measurements | images | fonts
Output – check that your final file type is either a JPG or PDF
DiskBank also offer template and specification guides!